 Espaliered fruit trees are an art form which are fun and add a special touch to your garden. Espaliered fruit trees have many great characteristics: 1) they can take up less space then normal, 2) by virtue of their design they allow more sun and air to circulate promoting better fruit production, and 3) harvest is generally easier due to their size and design. For more detailed information click on my previous post, The Art of Espalier Fruit Trees. For centuries, the art of espalier fruit trees has been very popular. As space continues to be a premium, I see more espalier trees in garden designs in this country.
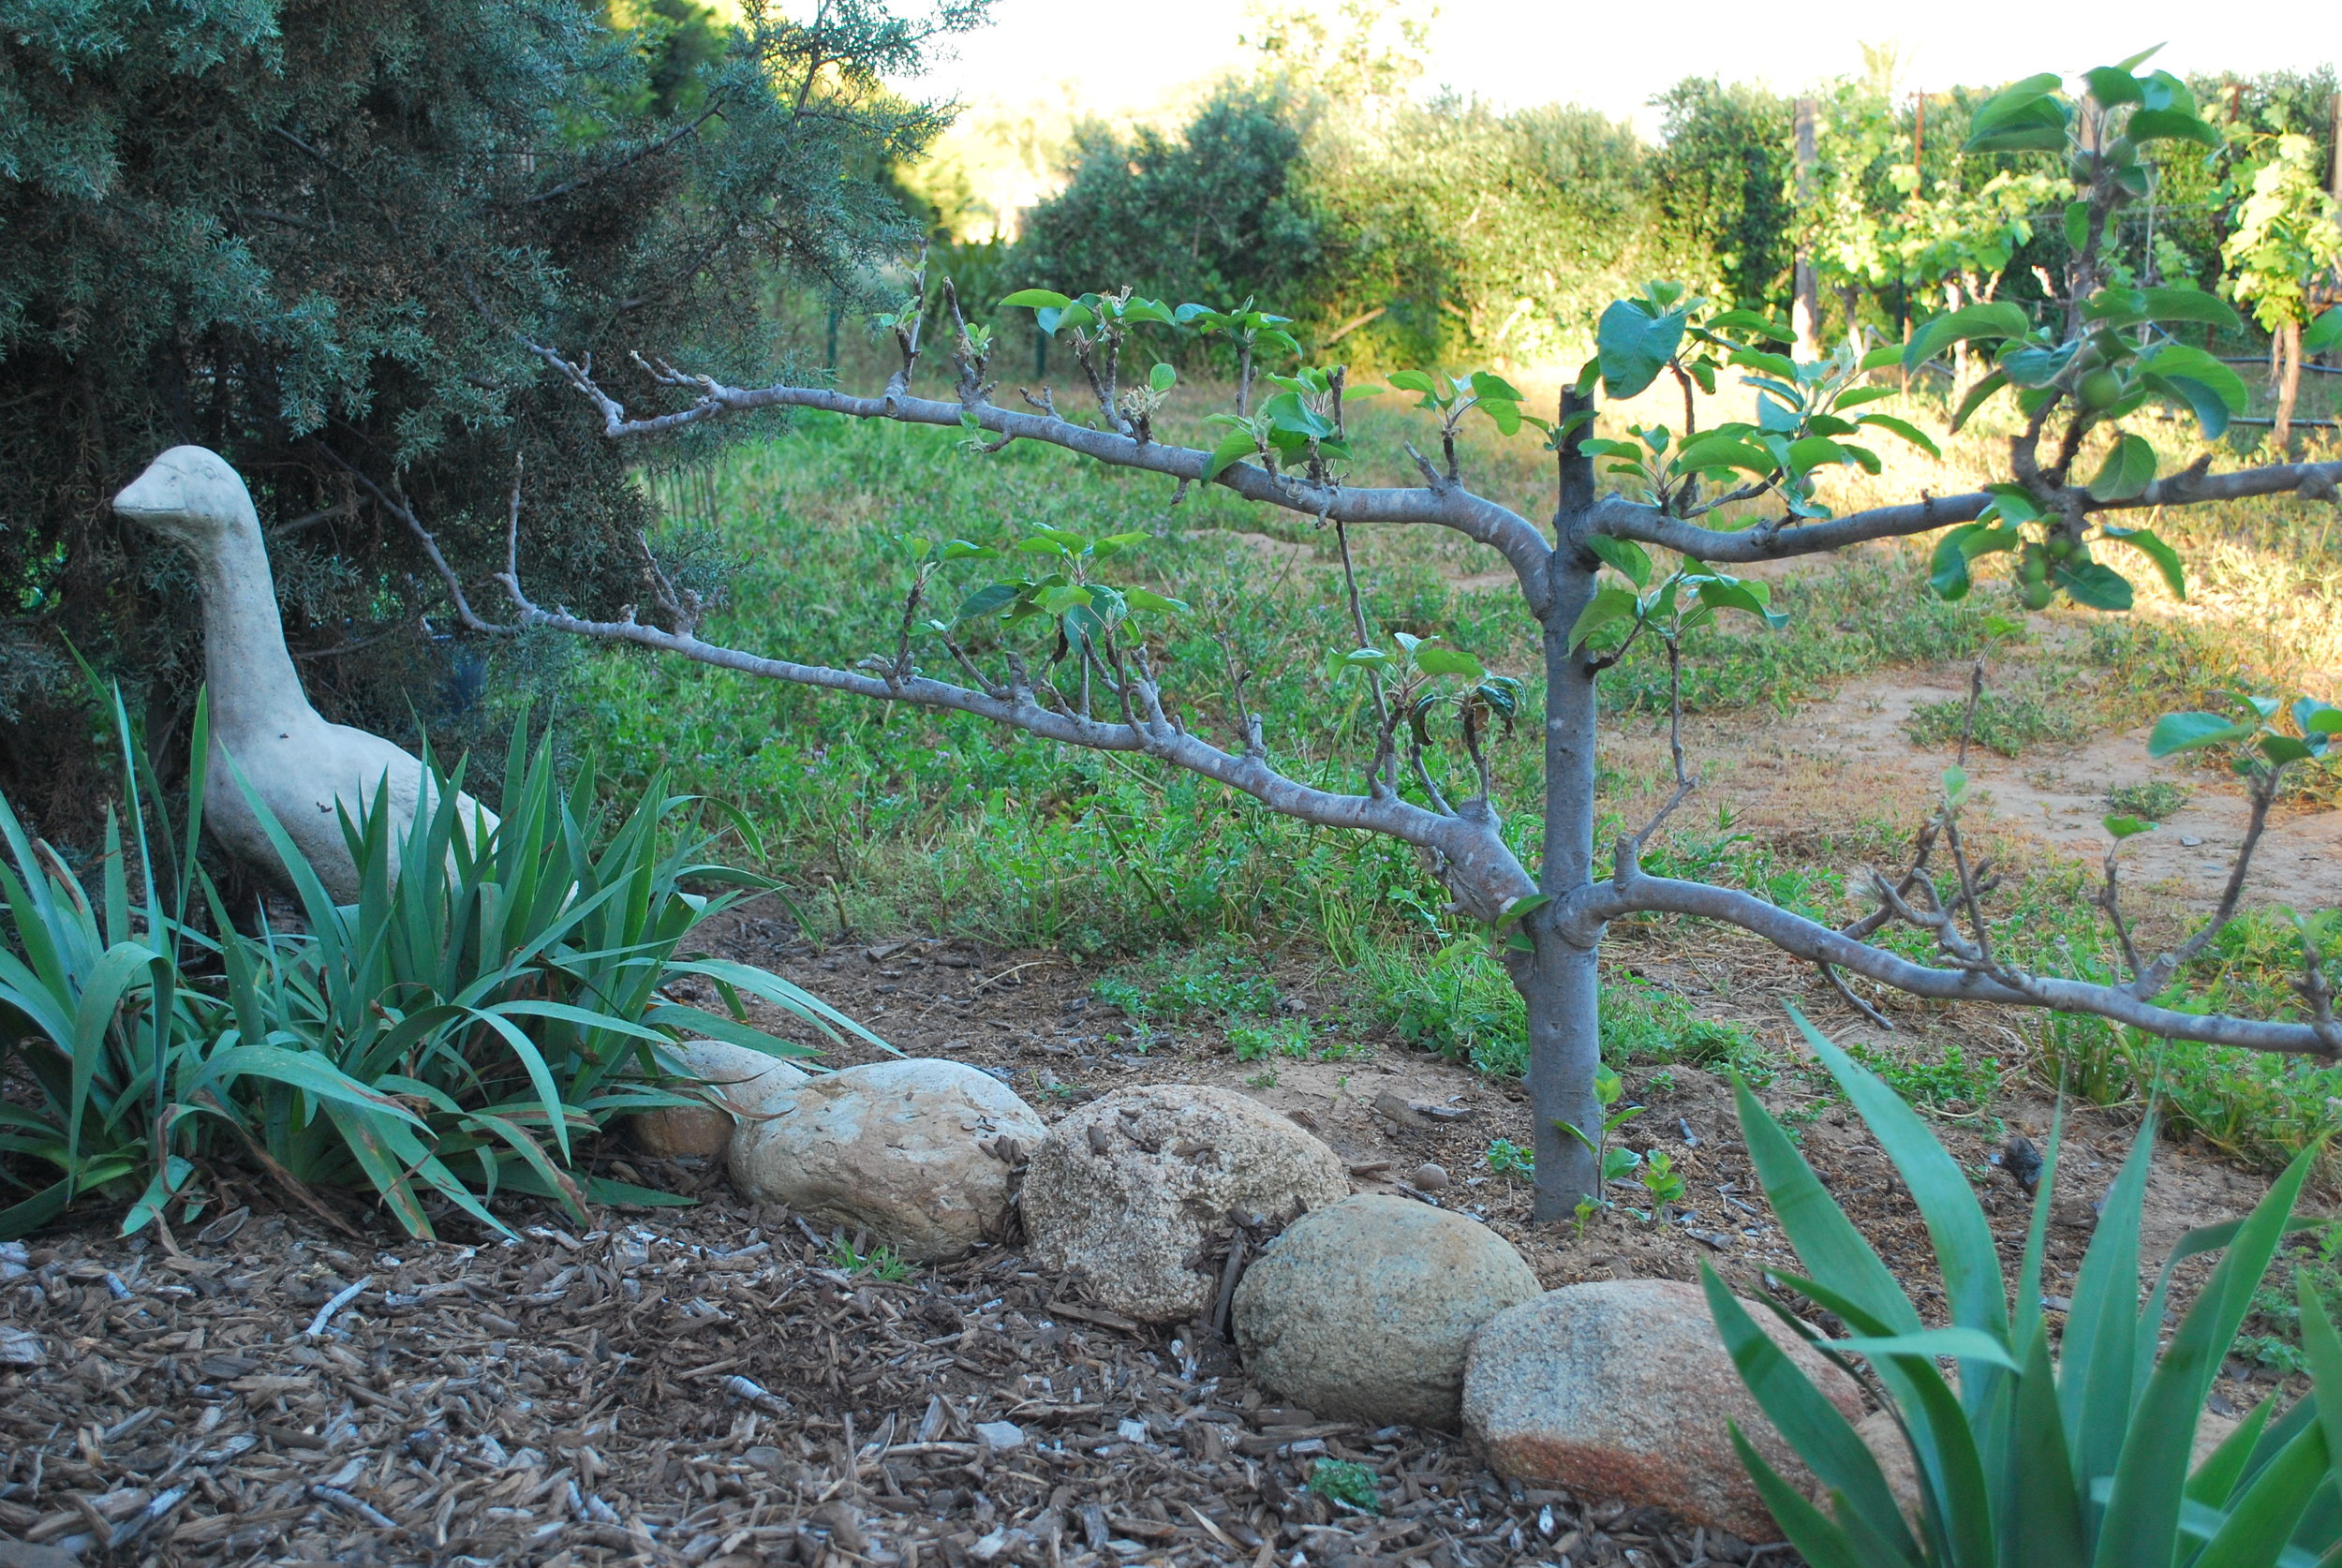
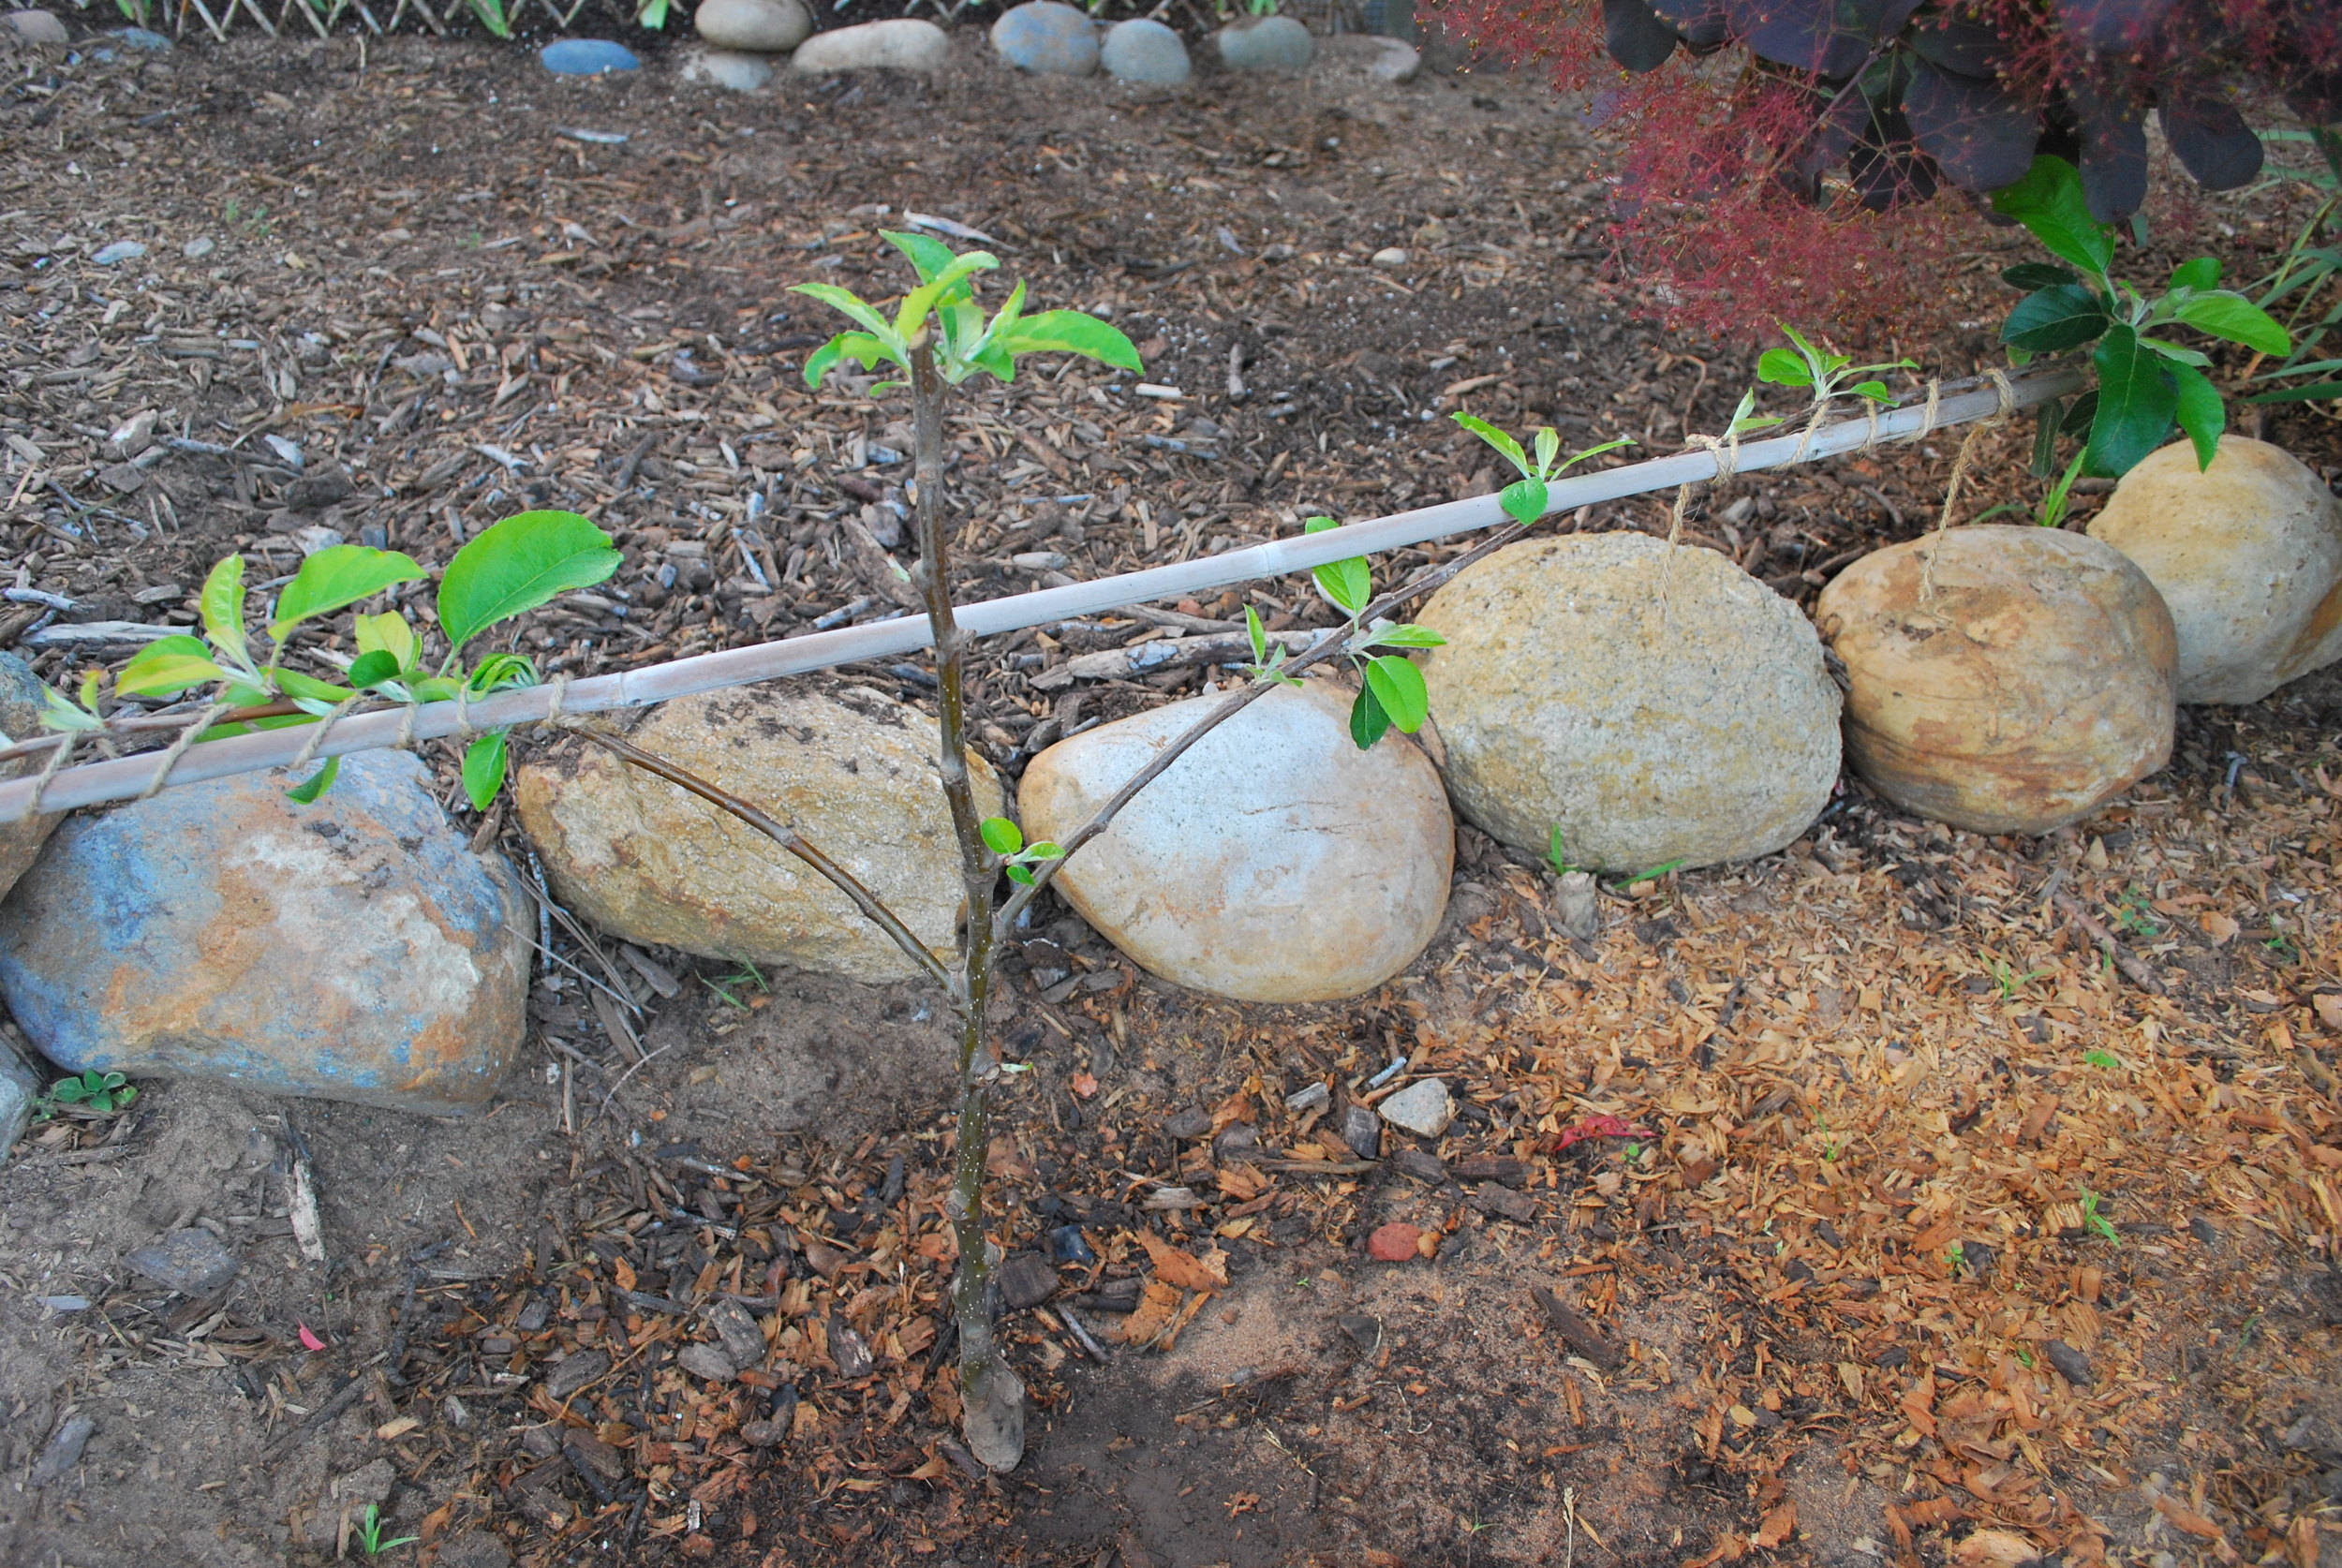
The photo above is an espalier Fuji fruit tree which I have had for many years. It makes a nice fence along the side of my chicken coop. This winter I purchased a bare root 'Ein Shemer' apple variety, which is a great low chill variety for Southern California and a good pollenizer for 'Anna' and 'Dorsett Golden' apple trees which I also grow. I wanted to repeat the low espalier fence along my chicken coop. Apple trees are one of the easiest fruit trees to espalier. Buying fruit trees as bare root is a great time of year to begin your espalier design.
Steps to Create a Simple Espalier Apple Tree:
1) Find a bare root tree that has a nice defined straight trunk with lateral branches coming off of it or numerous buds swelling on the trunk.
2) If you are lucky to find a tree that has lateral branches started where you want them, carefully trim off the rest of the lateral branches. Secure your lateral branches with a bamboo pole and garden tape or other structured sturdy material. Young espalier trees will need some type of espalier support until the trees mature and can hold their design.
3) Next trim off the top of your trunk to 8-12 inches above your lateral branches you are keeping. Make sure there are buds on the tree trunk below your cut. Buds grow into potential lateral branches, and eventually cordon arms.
4) The art of espaliered fruit trees is all about directing the energy and growth of your fruit tree for your desired design and form. The lateral branches you have left will bud and grow on the ends. This will create your first set cordon arms for your design. Once you have gotten the length of your desired cordon, usually 6-7 feet in width for an apple tree, then you can let the buds on your trunk grow upward until the tree trunk reaches another desired spot for a second set of lateral cordons. You can even try for a third cordon over time if you like.
5) As you apple tree continues to grow, pinch and trim your apple tree to keep creating your first set of lateral cordon arms, and second set.
6) It is as easy as that. Be sure and water deeply once a week your apple tree. As your apple tree matures, you can easily prune and shape your tree in the winter when it is dormant, and again in the summer, as long as you are careful not to prune the fruit spurs.
Please share if you have tried to espalier a fruit tree.
